Future feature: Manage programs in GrowthWheel Online

With our new programs feature you will be able to create your organizations programs with custom phases and assign them to your clients on GrowthWheel Online. 

With this new feature you’ll be able to:

  • Manage your organization’s programs.

  • Associate your clients to one or more of your programs.

Below, you can see the first mock-ups of how it will look like.


1. Manage your Programs under the organization’s settings page

We will have the option to manage your organization’s programs on the programs settings page under my organization settings menus. Here, you’ll find a list of all the previously created programs. 

You’ll notice an eye icon on the list view of the programs. You can click it to make each program visible, or not, under the engagement page for each client.

7256AA58-D966-4024-92A6-F92A414BC976.jpeg

2. Add new Programs with custom phases on the settings page

To create a new program, click the green button on the list view. You will see a dialog where you can input the program name, start and end date, add a logo, and associate a partner to the program.

You can also add custom phases for the program. Click the green program phase button to add a new one. You can always delete any option by clicking the trash icon.

9C39CB15-B804-4E8B-B68E-7D1E8FFC7A22.jpeg

3. Associate programs to your clients on the engagement page

On the engagement page under the client relation menu for each client, you’ll find the “Assigned program” button where you can have a multiple-choice selection from the dropdown menu with the options that were added on the program settings page.

You can also select the current program phase right on the table for the program added.

B7292A80-3A85-45BD-8B6C-074F9916B090.jpeg

4. Filter your Clients list by Programs

On your client list you’ll be able to filter your current clients by any program. Click the filter icon and select a program from the dropdown list. You can select one or more programs and the clients associated with those programs will be filtered automatically.

D288E460-634D-43C9-8FC3-2E80C2BBCF34.jpeg

In this quick video, we will show you how it works:

Please share your comment below, and take part in the development of the upcoming page.

Future Feature: New Pipeline view for Client list

We are adding a new “Pipeline View” for your Pre-Clients so you can manage different stages before becoming your clients.

You will see your pre-clients list as cards with basic contact and social information. You can also see the days since last contact with a color coding indicator, as well as the next scheduled meeting with your client.

With this new feature you’ll be able to:

  • Manage different stages of your pre-clients list.

  • Easily drag and drop your clients cards to move them to another stage. 

Below, you can see the first mock-ups of how it will look like.


1. Manage different stages of your pre-clients list

On my clients menu you will find the new pipeline view for your pre-clients client list only. In here you will have a view with different columns of stages on your pipeline. 

75402C58-F7E8-4727-B423-454CBA6C636B.jpeg

2. Easily drag and drop your clients cards to move them to another stage

If a client of yours is a lead qualified and you have sent them a proposal, you can click and hold on the card then drag it to the right until the columns have scrolled and drop it under the column Proposal sent.

6544DD40-02E1-465C-930B-3E375F982CD3.jpeg

In this quick video, we will show you how it works:

Please share your comment below, and take part in the development of the upcoming page.

Future feature improvement: Convert Ambitions to Outcomes

As an improvement to our GrowthPlan feature on GrowthWheel Online we will add the option to convert your ambitions to outcomes with just one click!

This new improvement will help you quickly and easily convert your ambitions, from your ambitions list page, to an outcome after being completed.

Below, you can see the first mock-ups of how it will look like.


1. Choose from the 3 dot menu on your ambition list the option “Convert to Outcome”

On you Ambitions list page you will need to click the 3 dot menu to see more options. Here, you’ll find “Convert to Outcome” option, by clicking this, you will convert this ambition to an outcome.

A599E31F-FC61-4220-BDBF-12B3E9B1142A.jpeg

2. Your Ambition will be automatically converted into an Outcome

Once you select the option on the ambitions page, to convert an ambition to an outcome, it will automatically convert it into an outcome. Next, you will see the outcome dialog to finish adding information about it.

Notice it indicates you this was an outcome created from an ambition, and it adds the name of the ambition.

BE6F8C27-B66C-4B45-9304-70D4BE15BA6F.jpeg

Please share your comment below, and take part in the development of the upcoming page.


Future feature: Company Events

Users can now describe the history of the company with records of specific company events. Founded. New location. New management, new investors, and others are examples of types of events.

With this new feature you’ll be able to:

  • Keep track of the historic company events.

  • Download as part of the Full business profile Report PDF file.

Below, you can see the first mock-ups of how it will look like.


1. See a list of your Client’s Company Events

As part of your business section, you can add and see a list of your client’s company events. Each event has a visibility option, to be included or not on the reports.

company+events.001.jpg

2. Create new Events

You can add a description, select the type of event from our dropdown options, add a date and a picture.

company+events.002.jpg

3. Print as PDF file as part of your Business Profile Report

In the PDF there is a Visual timeline showing the events. The records show up on the summary page.

Screen Shot 2021-05-04 at 16.42.24.png

Please share your comment below, and take part in the development of the upcoming page.


Future Feature: Reminders

In the near future you will have a new Reminders feature which will help you to create and organize your reminders easier than ever. You can use it for interactions, emails, ambitions, or even decisions and actions that you want to track and remember.

Below, you can see the first mock-ups of how it will look like.


1. Create new Reminders under Client Relation

Create new reminders, edit them — easily change the date and time, assign a priority and select if it’s a recurring reminder.

reminders.001.jpg
reminders.002.jpg

2. Add Reminders directly from emails

We want to facilitate you adding reminders on different parts of the platform. Add a reminder of a meeting with a client, a pending review of a task, and more; directly from an email, an interactions or even a decision and actions.

reminders.003.jpg

Please share your comment below, and take part in the development of the upcoming page.

Future feature: Sustainable Development Goals under GrowthPlan

A new big feature across the platform will be the new Sustainable Development Goals and Outcomes under your GrowthPlan. This feature will support the process of defining and tracking the SDGs.

With this new feature you’ll be able to:

  • Add new SMART SDGs.

  • Select the Subcategory/Target of your choice for each Goal.

  • Add the Outcomes achieved for your SDGs.

  • Download SDGs and Outcomes as part of the Full GrowthPlan Report PDF file.

  • Download a full analytics report of your Client’s or Network SDGs and outcomes.

Below, you can see the first mock-ups of how it will look like.


1. Create your S.M.A.R.T Sustainable Development Goals

Add all the information to make S.M.A.R.T. Goals, which are Specific, Measurable, Actionable, have someone Responsible, and have a Time horizon.

roadmap+sdg.002.jpg

2. Select the Subcategory/Target for one of the 17 Goals

Each Goal has its Subcategories/Target, you can select from the dropdown which one you want to track.

Image 2020-09-18 at 3.49.42 PM.png

3. Sustainable Development Goals list

Get an overview list with all your Sustainable Development Goals. Just like ambitions, you can assign a responsible person from this view and also select the status of it from the stoplights circles.

chat feature.003.jpeg

4. Download your Goals list as a PDF file

You can now download each Goal as a single PDF. You can also download all the SDG as a part of the GrowthPlan PDF report.

chat+feature.004.jpg

5. Keep track of your SDG Outcomes

Just like you keep define and track your Sustainable Development Goals, you can also keep track of the outcomes for each one of those.

chat+feature.006.jpg

6. Add Outcomes for all your SDGs

For each outcome of your SDGs, you can select the Subcategory/Target, a unit of measurement, add a specific amount for it, and add as well description and the time horizon.

Image 2020-09-18 at 3.56.31 PM.png

7. Print the SDG Outcomes as part of your GrowthPlan PDF Report

As well as your Goals, you can also download all the Outcomes as a part of the GrowthPlan PDF report.


8. Download Analytics Report for your SDGs/Outcomes

As an advisor, you can compile a PDF report with analytics and upload it to any other CRM system you might be used for reporting.

If you are a center manager or network manager, you can see analytics for your entire organization or network. This is a fast way to get the big picture of how are you doing with the SDGs planned.

Image 2020-09-21 at 5.13.09 PM.png


Please share your comment below, and take part in the development of the upcoming page.

Addition to GrowthPlan: Future Positions

In the near future you will have a new submenu under GrowthPlan called “Future Positions”, where you’ll be able to add new positions to the company with it’s pertinent description.

With this new feature you’ll be able to:

  • Create new positions to the company.

  • Specify educational and organizational level.

  • Add direct costs to that position.

  • Download all future positions as a PDF file.

  • Download an organizational chart with current and future positions as PDF.

Below, you can see the first mock-ups of how it will look like.


1. Create new positions

Add new positions to your company with all the relevant information about it: role, references, employment date, salary, other costs…


2. Future Positions list view

Get an overview list with all future positions and their responsibilities.


3. PDF files

Download directly from future positions page a PDF with all the new positions to the company.

Image 2020-05-09 at 10.43.03 AM.png

Choose to download also an organizational chart that includes current and future positions to the company.

Please share your comment below, and take part in the development of the upcoming page.

With the upcoming #hashtags you can categorize and search for clients, tools, mentors and more with any label

A new big feature across the platform will be adding tags to categorize, search and filter all the different records you have on the platform.

We are starting by developing tags in your client’s files, and soon after you will be able to tag clients in one or several categories (type, cohort#, status etc).

Tagging helps you quickly filter and find the files by categories that you define. A tag corresponds to a one or two keyword phrase that you define yourself.

Below, you can see the first mock-ups of how it will look like.


1. Tag your Client’s files

All tags that have been added to each file, appears now on the list view of your Client Files menu. You can click on “Show more” or “Less” to manage the amount of tags shown on the list.

If you haven’t assigned tags to a file this section will remain blank.

Image 2020-01-31 at 8.57.42 AM.png

2. Add tags while uploading a file

When you’re uploading a new file, you have the option to add tags to it, or you can leave this section blank and add them later.

Image 2020-01-31 at 11.39.32 AM.png

3. Access the Tags library

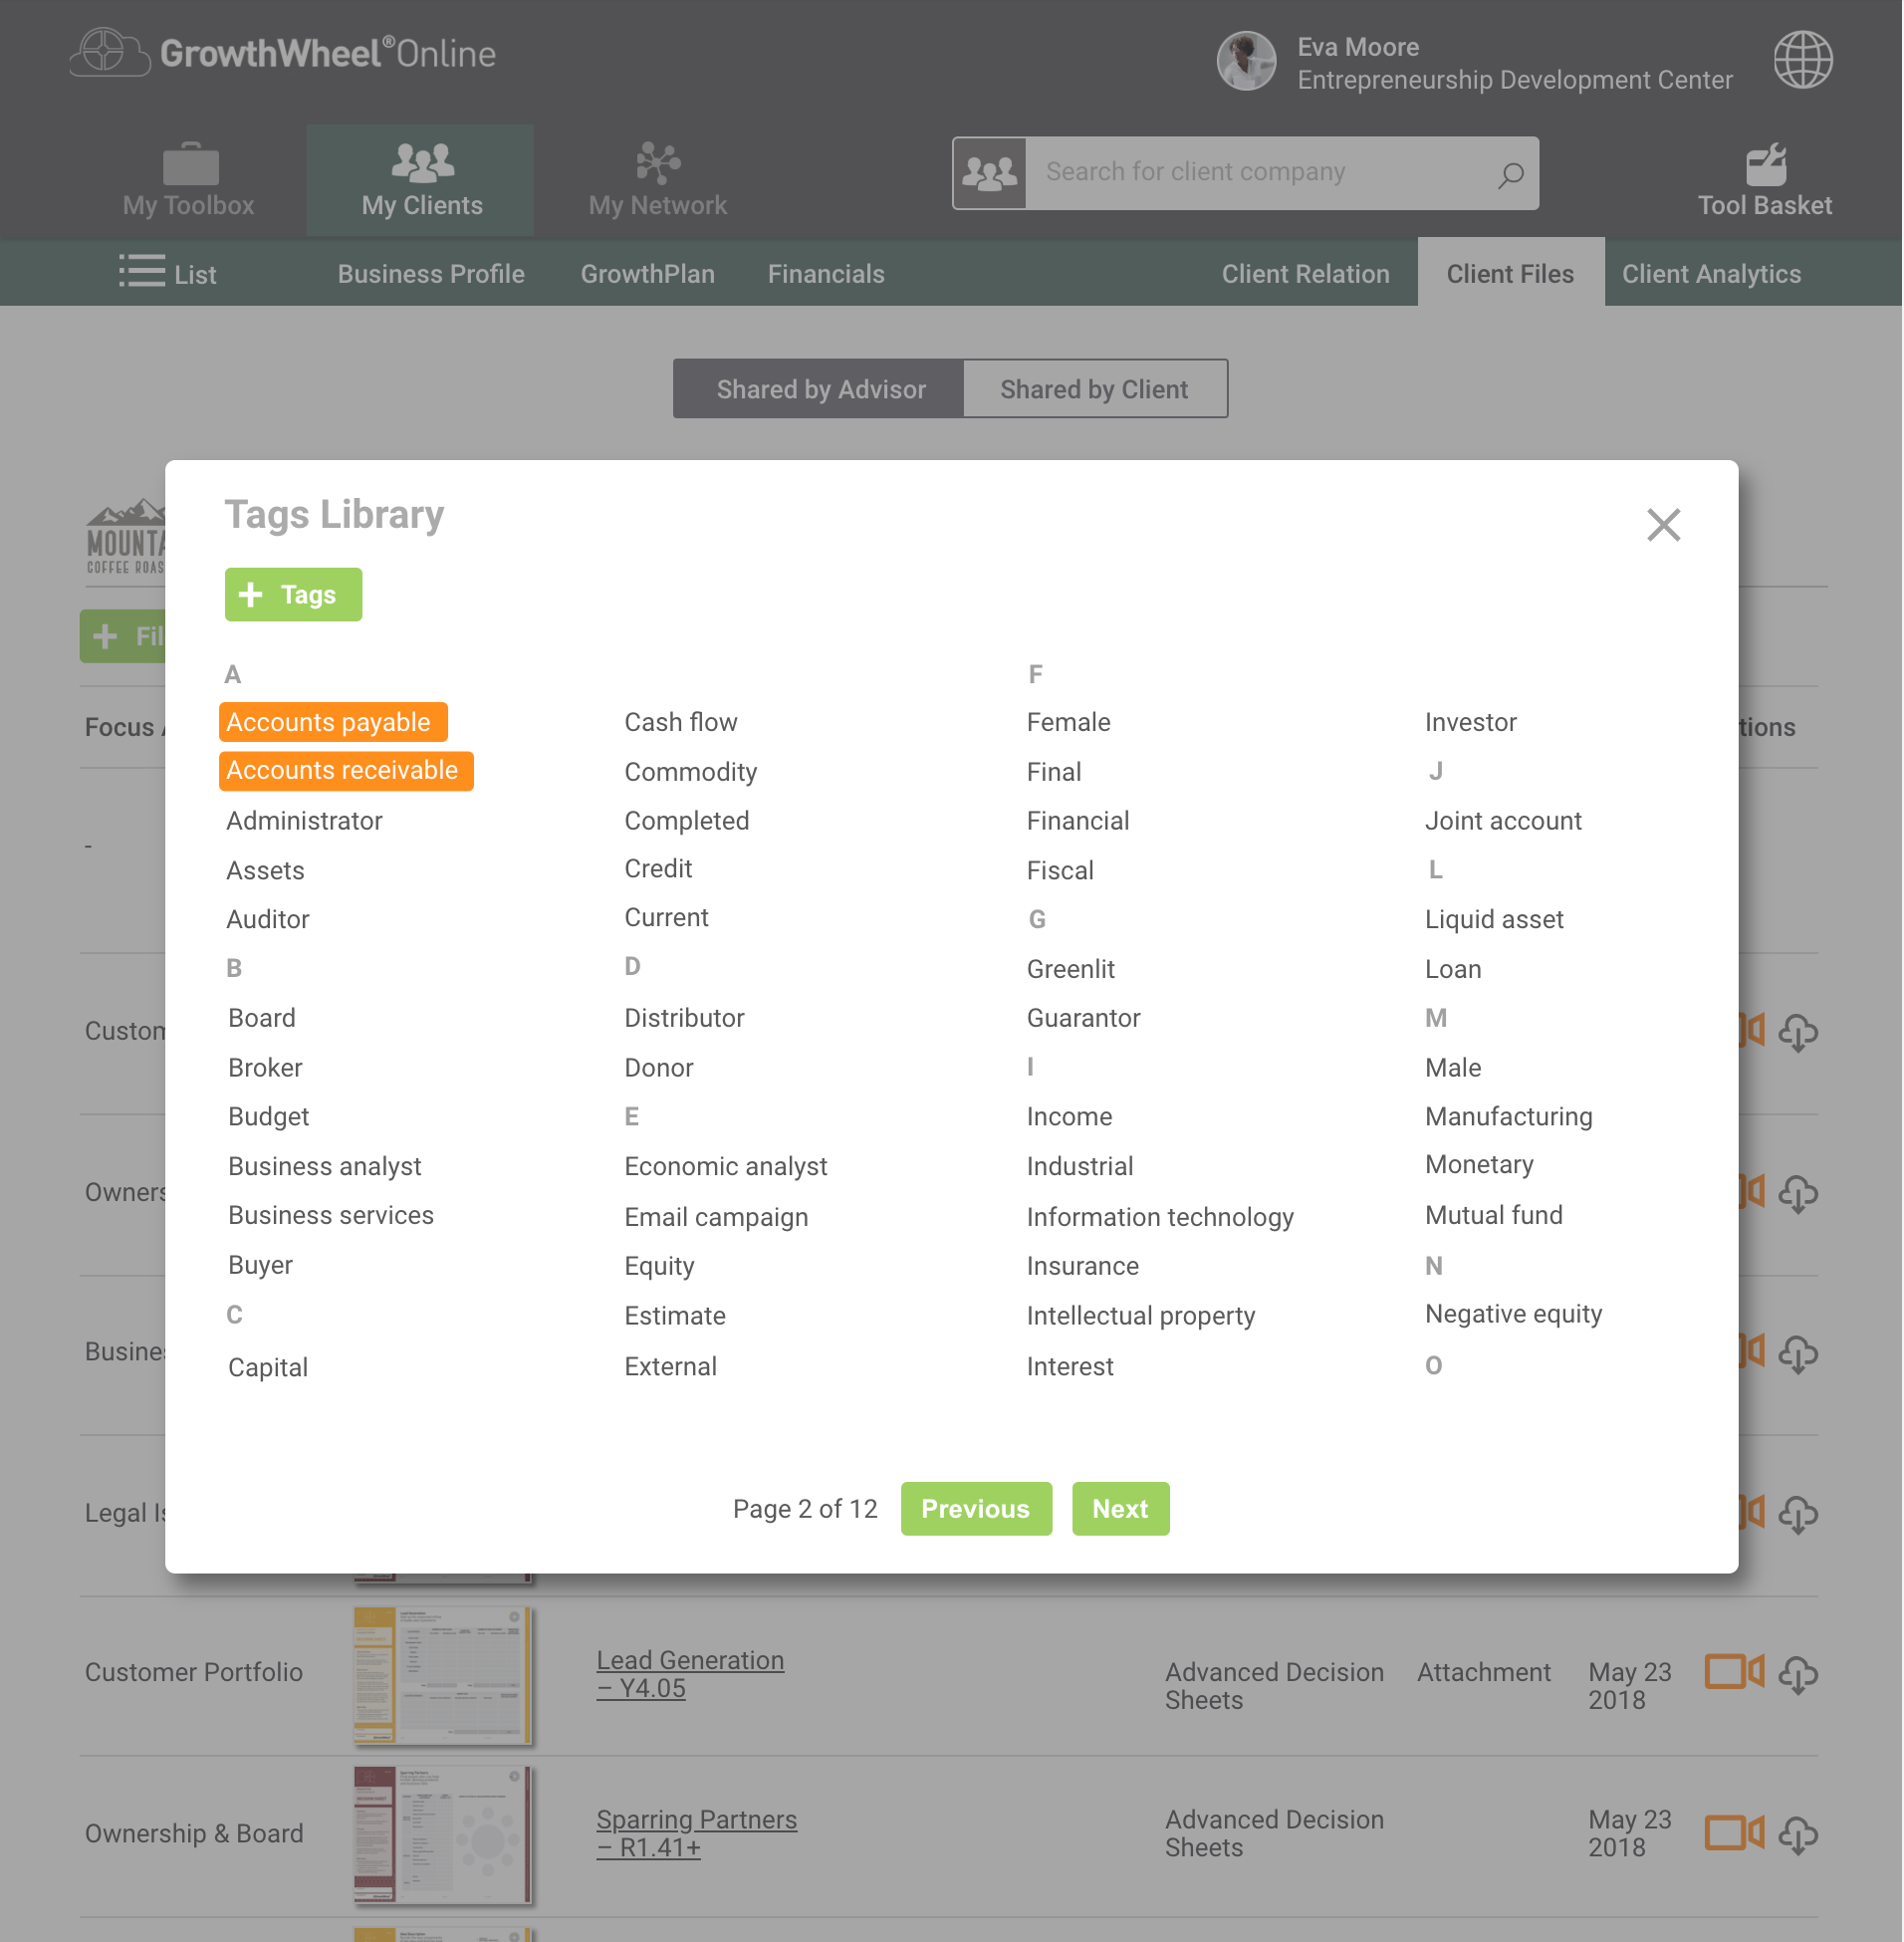
From the Client files page, upload a file and then click on “Tags Library” to add a tag. Choose + Tags and type your keyword, or, select from the list of previously added tags.

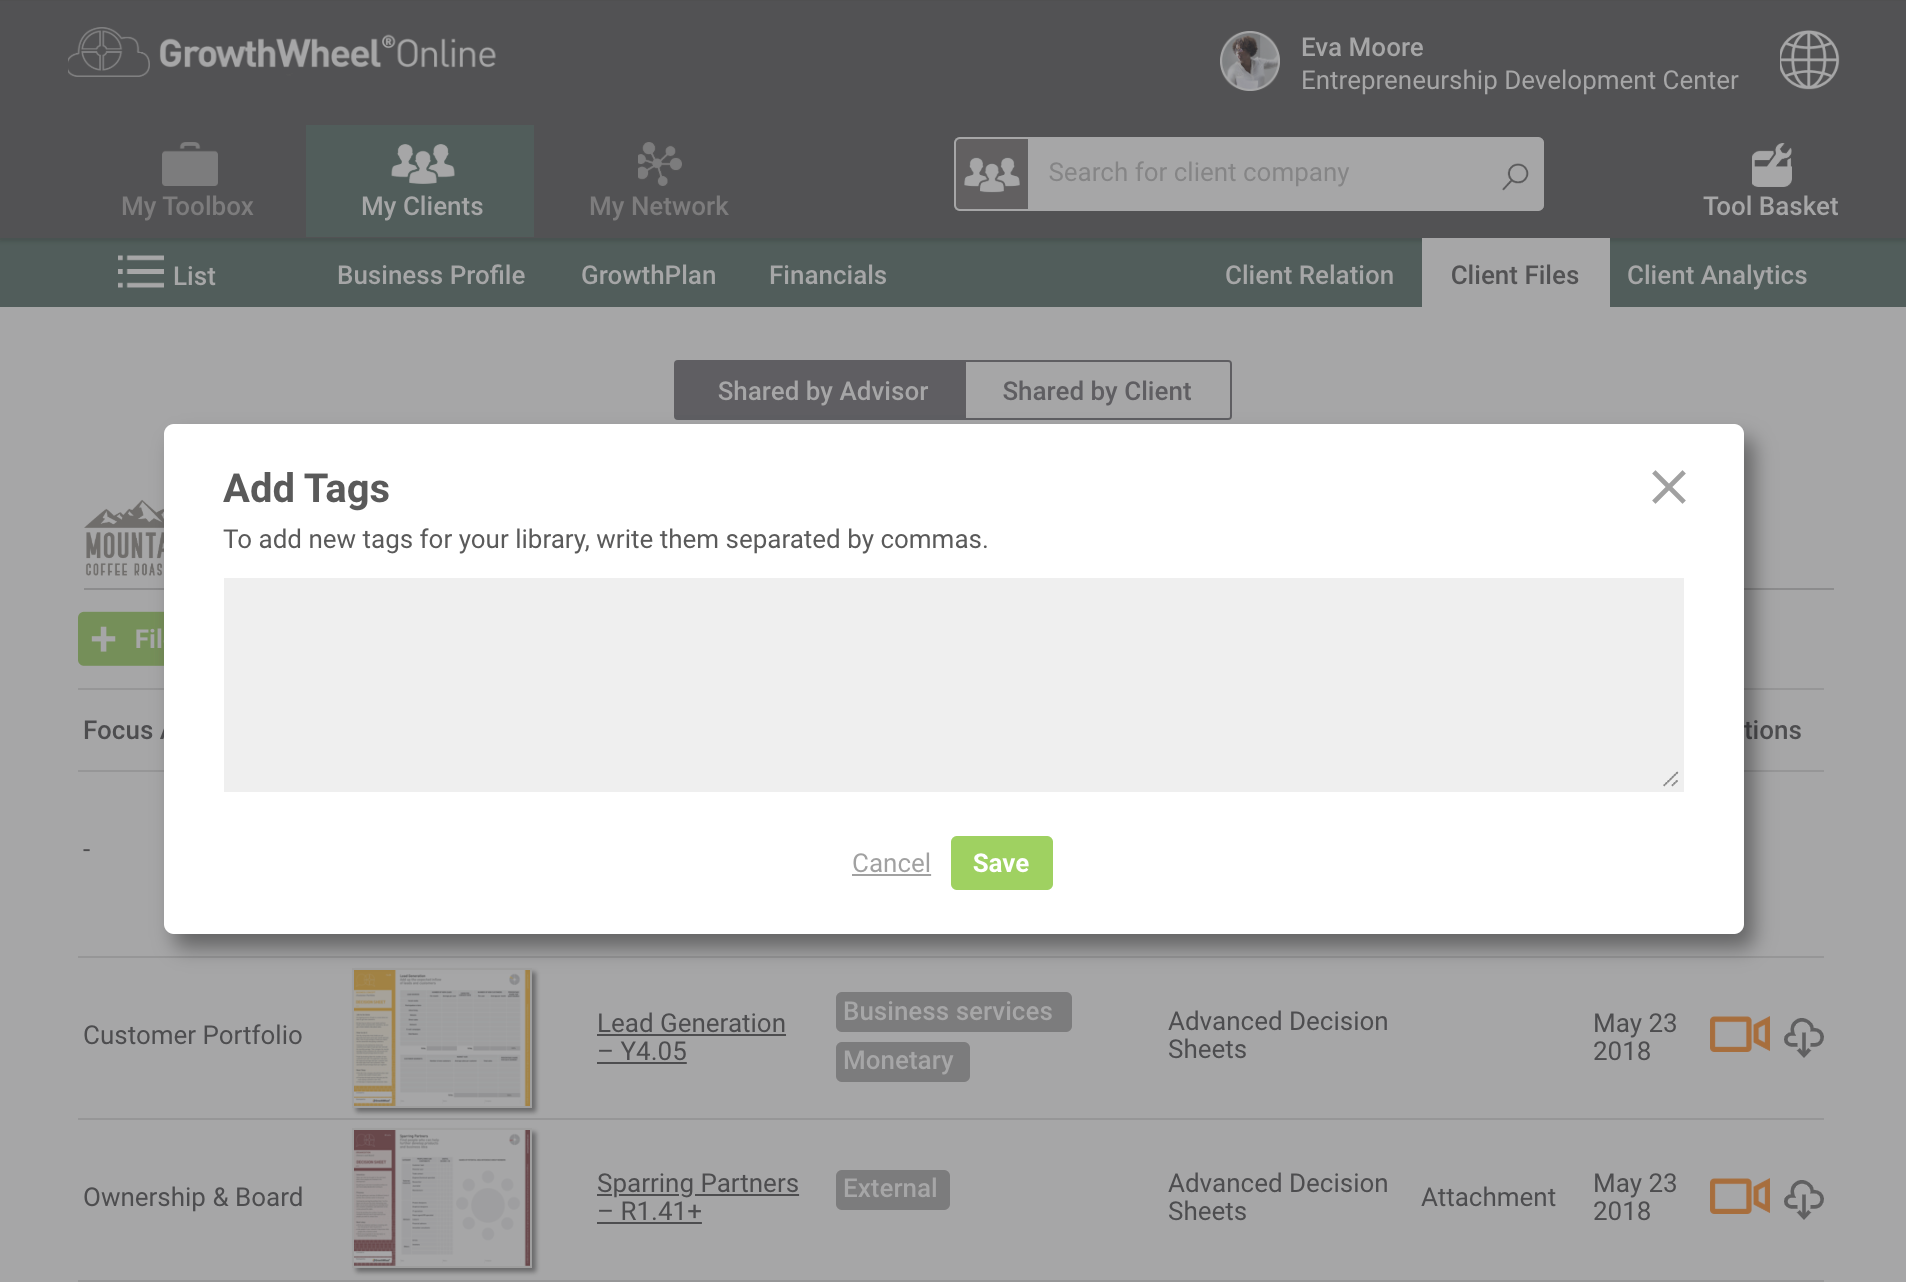
You can add, delete and modify tags from this library. To add several tags at one time, type a comma between them.

Tags that appear in orange are already assigned/selected to your file. To unassign a tag, simply click the “X” on the tag while hovering.


4. Now you can filter files by tags

From this same page, you can filter files using tags. Start by clicking the filter icon. You’ll have a search bar which helps looking faster for tags.

Image 2020-01-31 at 8.58.13 AM.png

Please share your comment below, and take part in the development of the upcoming page.

Add Value Propositions soon under your client’s Business Profile.

Our Business menu will soon have one more option where you can add “Value Propositions” to your client’s profile.

With this update you will be able to:

  • Create a Value Proposition plan.

  • Describe current customer pains.

  • Determine potential customer gains.

  • Print a visual PDF report.

With this new feature, as an advisor, you will be able to create a plan with alternatives and solutions using our system to manage your client’s needs and pains.

Below, you can check out the first mock-ups of how it will look like.


1. Add Value Proposition information

In this new section of the Business Profile you will be able to add different offerings to improve your client’s business with tools provided by GrowthWheel, besides of planning their promise of value to be delivered.

You and your client can view or edit any Value Proposition on GrowthWheel Online at any time.

Screen Shot 2019-12-01 at 5.21.29 PM.png

2. View all the information in your list

The Value Proposition section gives you and your client a visual overview of how the organization could stand out from their competitors or just make improvement in their statement of benefits to customers.

Screen Shot 2020-01-15 at 9.39.32 PM.png

3. Download as PDF

All the new information about your client’s value proposition can be printed as a PDF file — ready to be shared with colleagues or used for reporting at your center.

Screen Shot 2020-01-15 at 10.10.44 PM.png

Please share your comment below, and take part in the development of the upcoming feature.

New page coming with risk analysis as part of the GrowthPlan.

As part of our new GrowthPlan, you will soon be able to add Risks under a new submenu that is currently in development.

This new feature will allow you to do the following:

  • Add a new risk.

  • Rate Likelihood and Consequences.

  • See a matrix with the rating.

  • Add ways to de-risk.

  • Download PDF-file with risks or include in the full GrowthPlan PDF.

Using this page advisors and their clients can be transparent about risks to their lenders and other stakeholders.

Below, you can see the first mock-ups of how it will look like.


1. Risk page with a list view

When you click on Risks under GrowthPlan menu, you’ll have a list of previously added risks. In this page you’ll be able to add new ones and delete old ones.

You can see the autogenerated matrix of Likelihood/Consequence rating.

Screen Shot 2020-01-08 at 3.36.32 PM.png

2. Add new Risks

Know how to tackle your risks by adding information about it. You can describe the risk and also add counter measures.

The platform will automatically calculate the status level of each one based on what you input on likelihood and consequences.

If it’s a high risk you’ll see it in red, if it’s medium in yellow and for low risks you see it in green color.

Screen Shot 2020-01-08 at 3.45.40 PM.png

3. Download a PDF of this page

As always you will be able to download a PDF of the risk page by clicking the download button, were you can select if you wish to download the single page PDF or the Full GrowthPlan report.

Screen Shot 2020-01-08 at 3.58.40 PM.png


Please share your comment below, and take part in the development of the upcoming page.

New submenu “Resource Partners” under my network

In the near future, you will see a new submenu under My Network that's called "Resource Partners" this tab will be found in between Mentors and Clients.

With this new feature you’ll be able to:

  • Add new Resource Partners related to your business.

  • Classify different types of possible partners.

  • Refer resource partners.

  • Add the services they offer.

  • Associate advisors and assign to Clients.

  • Add tags for easier search and filter.

  • Download as PDF files all the added information.

Below, you can check out a video and the firsts mock-ups of how it will look like.


In this quick video, Elizabeth Binning will show you how it works.


1. Resource Partners page

You’ll see a new submenu called "Resource Partners", where you can add new Resource Partners and have the list of previously added ones.

From here you can access to their website and refer any resource partner. You can also contact, archive or download the partner profile PDF.

Image 2020-04-25 at 5.57.56 PM.png

2. Resource Partner Profile Pop-up

You can now add detailed information about your Partners to his profile under this page, such as contact information, associated advisors, clients assigned and private notes.

Image 2020-04-25 at 6.03.44 PM.png

3. Download your Resource Partners Contact List

You can download the list by clicking the download button on the page.

Image 2020-04-25 at 6.04.59 PM.png

4. Download also each Partner Profile

You get to download also the profile of each resource partner all together in one page.

Screen Shot 2019-12-25 at 1.15.35 PM.png

Ideas or suggestions? Please share your comment below, and take part in the development of the upcoming menu.

0 Likes


New "Calendar" Feature under My Clients Menu

We are working on a new feature called “Calendar” that allows advisors to have an overview of their upcoming and past interactions for all clients, which they currently cannot see.

With the new feature you will be able to:

  1. Add interactions.

  2. Have a list view of your past and upcoming interactions.

  3. Have a Grid View as a calendar of this information.

Below, you can see the first mock-ups of how it will look like.


#1. See your calendar interactions list

In the “Calendar” page you can now see the list of the upcoming and past interactions with all the relevant information previously added such as: Client company, type, date, title and location.

Screen Shot 2019-11-12 at 8.15.34 AM.png

#2. Add a new interaction

From this same place page you can also add new interactions with your clients.


3. Change to Grid View to display it as a regular calendar

You also have the option to see this page as a regular calendar where you can click each interaction to see more information.

Screen Shot 2019-11-12 at 8.15.59 AM.png

4. See and edit information on each interaction

By clicking on each interaction weather is on the list or grid view you’ll see this pop up with all the information related to a previously added interaction or in blank to be filled out and creating a new one.

Screen Shot 2019-11-12 at 8.16.52 AM.png

5. Change between years

You also have an option on the right to change between year and have access to this information.

Screen Shot 2019-11-12 at 8.23.34 AM.png


Please share your comment below, and take part in the development of the upcoming page.

New: Improved client relations menu and Impact Validation Forms

We are working on a new feature for tracking impact as an advisor on GrowthWheel Online.

Our Client Relations menu will soon have many more options including more advanced Interactions, and two new tabs: Referrals and Impacts.

With the update to client Interactions you will be able to:

  • Add more types of interactions, focus areas and the topic of the interaction

  • Add other advisors present during the meeting

  • Add the clients that participated in the interaction

  • Add referrals to other organizations discussed with your client

  • Add decisions and actions, or outcomes

  • And finally, add an impact

By adding a new impact, you create a verification form that can be used as a succes story of your help to the client’s business, e.g. verification form for Increase in Revenue.


Below, you can see the first mock-ups of how it will look like.


#1 Add new impact
In the “Interactions” menu, create a new impact by choosing a title and the type of impact (revenue, profit, loan, capital, contract, export, start up, jobs, certification, miscellaneous)

Screen Shot 2018-11-30 at 11.52.31 AM.png

#2 Request verification from client
Add more details and request a verification from your client. An email template will appear to request your client to sign the form. You can edit the email.

Screen Shot 2019-01-02 at 4.30.00 PM.png

#3 View all impacts and their status
Find the impact you created in the impact list, where all impacts are categorized on impact type, amount, unit, and quarter. Here you can also view the status of each verification.

Screen Shot 2018-10-02 at 4.50.09 PM.png

#4 Download impact as PDF
Request your client to use their business as a success story and download the impact validation form as PDF.


Please share your comment below, and take part in the development of the upcoming page.

Manage Your Clients’ Accounts

We are working on a new feature that will make it easier for you to manage your clients’ accounts on GrowthWheel Online.

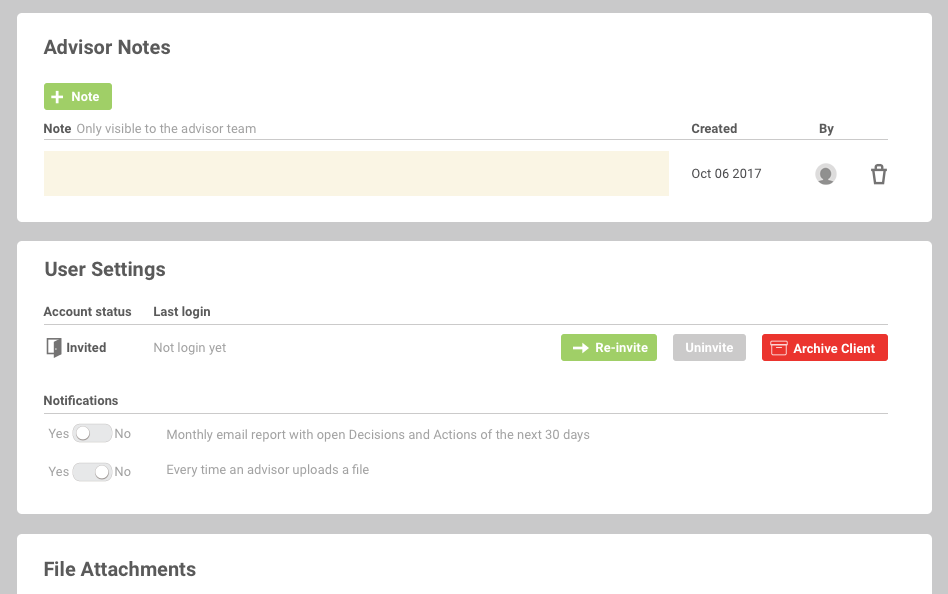
Under the “Team” menu you will find a new column where you can see the status of your client: invited, not invited, or not logged in yet. If your client hasn’t logged in yet, you can re-invite your client. If you no longer wish that your client has access to the company profile you can archive your client.

With the new features you will be able to:

  • View your client’s status

  • Manage your client’s information

  • Archive clients


Below, you can see the first mock-ups of how it will look like.


#1 View your client’s status
In the “Team” menu you can now see for all clients if they have been invited or not, and you can choose to re-invite a client if he or she didn’t log in.

Screen Shot 2018-11-30 at 11.52.31 AM.png

#2 Manage client information
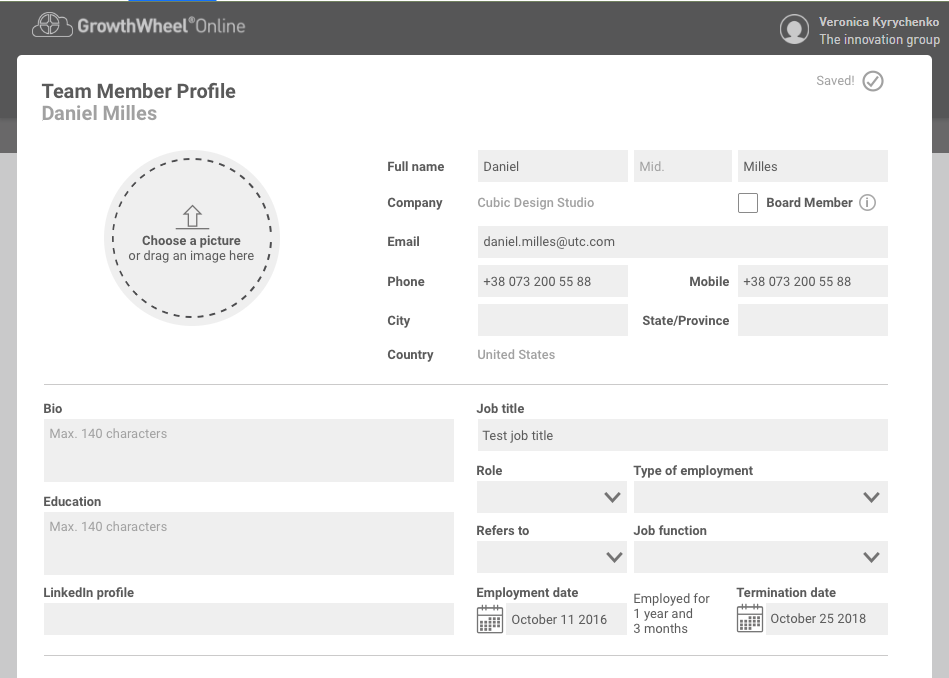
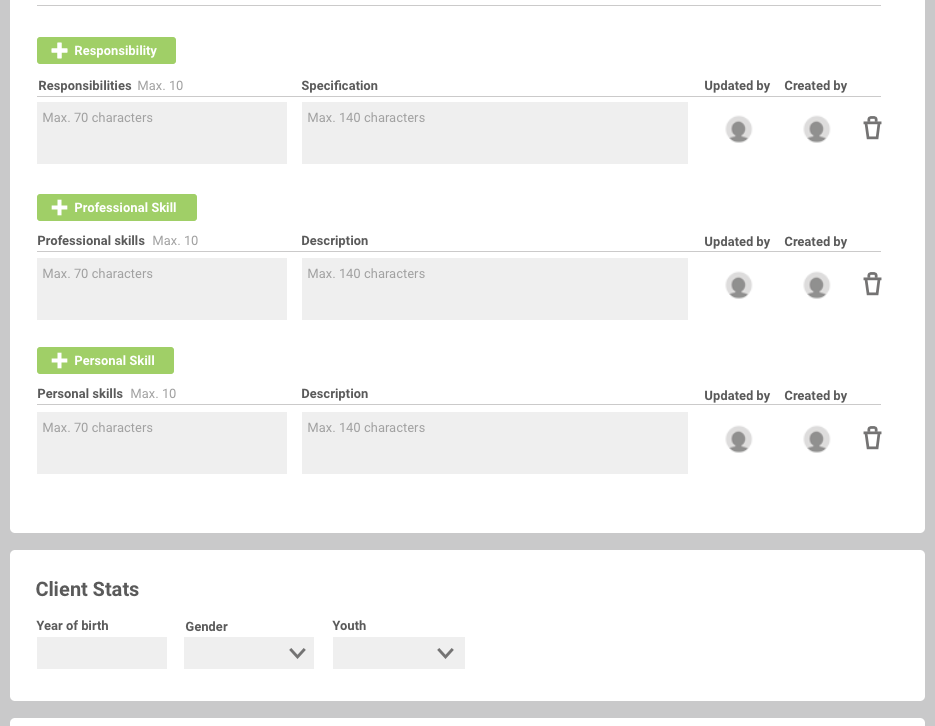
You can now add more detailed information about every client, such as responsibilities, professional and personal skills, and notes, or you can manage user settings.


#3 Archive clients
If you no longer want a client to be visible on the team members page, you can now archive that client.

Screen Shot 2018-10-02 at 4.50.09 PM.png


Please share your comment below, and take part in the development of the upcoming page.

Help your clients evaluate their business with our upcoming Business Financials

In addition to the Business Profile, you will soon be able to add even more information about your client companies thanks to our new Financials menu that is currently in development.

Financials will help you produce a financial summary of your client’s business, and is essential to assess a company’s progress and growth. You will also be able to download all the data you add to Financials as a complete, visual PDF report.

Currently, we are working on the development of the following financial summaries:

  • Funds received

  • Investment Catalogue

  • Product Forecast

  • Market Forecast

  • Risk Assessment

  • Financial Ratios

  • Revenue

  • Revenue breakdowns

  • Cost structures

  • Employees

  • Profit

  • Balance sheets

Please note that the Financials menu is not a finished product yet: the ideas and mock-ups in this post are still in progress.


Screen Shot 2018-10-03 at 11.13.10 AM.png

#1 Revenue

Get an overview of your revenue by adding information about the revenue per quarters and revenue by year.


Screen Shot 2018-10-03 at 11.13.18 AM.png

#2 Revenue Breakdown

In the revenue breakdown, you will be able to add information about revenue per product/service and revenue per market/channel.


Screen Shot 2018-10-03 at 11.13.27 AM.png

#3 Cost structure

Using the cost structure, you will be able to keep track of all direct costs and all operational costs, divided into different cost categories.


Screen Shot 2018-10-03 at 11.13.54 AM.png

#4 Employees

Get an overview of all employees by adding information about the employee count by quarter and by year.


Screen Shot 2018-10-03 at 11.14.02 AM.png

#5 Profit

List gross profit, operating profit and net profit by quarter and by year.


Screen Shot 2018-10-03 at 11.14.12 AM.png

#6 Balance sheet

The balance sheet is a composition of Assets and Liabilities. By adding records to one category, the same numbers will be added to the other to remain balance.


Screen Shot 2018-10-03 at 11.14.21 AM.png


#7 Funds received

Add information about received funds such as loans or investments, by quarter or by year.


Screen Shot 2018-10-03 at 11.14.32 AM.png

#8 Investment catalogue

In the investment catalogue, you will be able to create an overview of your total investments, total return, and accumulated cash flow.


Screen Shot 2018-10-03 at 11.14.42 AM.png

#9 Product Forecast

Produce a Revenue Forecast per product or per market. Add numbers to the product forecast by quarter or for the next three years.


Screen Shot 2018-10-03 at 11.14.53 AM.png

#10 Market Forecast

The Revenue Forecast helps you decide what products or markets are going to drive growth. Add numbers to the market forecast by quarter or for the next three years.


Screen Shot 2018-10-03 at 11.15.03 AM.png

#11 Risk Assessment

Assess risks by adding information about likelihood, consequences and counter measures


Screen Shot 2018-10-03 at 11.15.12 AM.png

#12 Financial Ratios

Evaluate the overall financial condition of your organization with Financial Ratios


Ideas or suggestions? Please share your comment below, and take part in the development of the upcoming menu.

New menu in GO: Create and schedule events for training courses in “Services”

With our new menu “Services”, advisors will be able to create and schedule events for courses, workshops, or other types of training in their center. 

This feature will give you many new possibilities. When creating a new event, detailed information can be added to each training ranging from topic, language, partners, instructor, duration, and much more.

Starting with the List page, advisors create templates of programs. This is followed by customizing and scheduling the events on the calendar page. Once the event is over, it will become visible on the History page, where advisors can add the participants. Finally, statistics are available for all created programs.

All the information added within “Services” can be downloaded as PDF files.

Using this page, business advisors and their clients can stay informed about every event that is happening within your organization. 


#1 View trainings in your list
The list tab gives you an overview of all created events and their details.

Screen Shot 2018-09-24 at 3.25.43 PM.png

#2 Monitor past events within history
Stay updated on who joined what events in the past, what topics have been addressed, and much more. 

Screen Shot 2018-09-24 at 3.28.48 PM.png

#3 View event analytics
Get a visual overview on the number of trainings, participants, type of events, and top 10 instructors within the analytics page.

Screen Shot 2018-09-24 at 3.30.59 PM.png

#4 Download as PDF
All the information added to Services can be downloaded as PDF files

Screen Shot 2018-09-24 at 3.32.48 PM.png


Please share your comment below, and take part in the development of the upcoming page.

For managers: Save your organization time and upload the tools at once

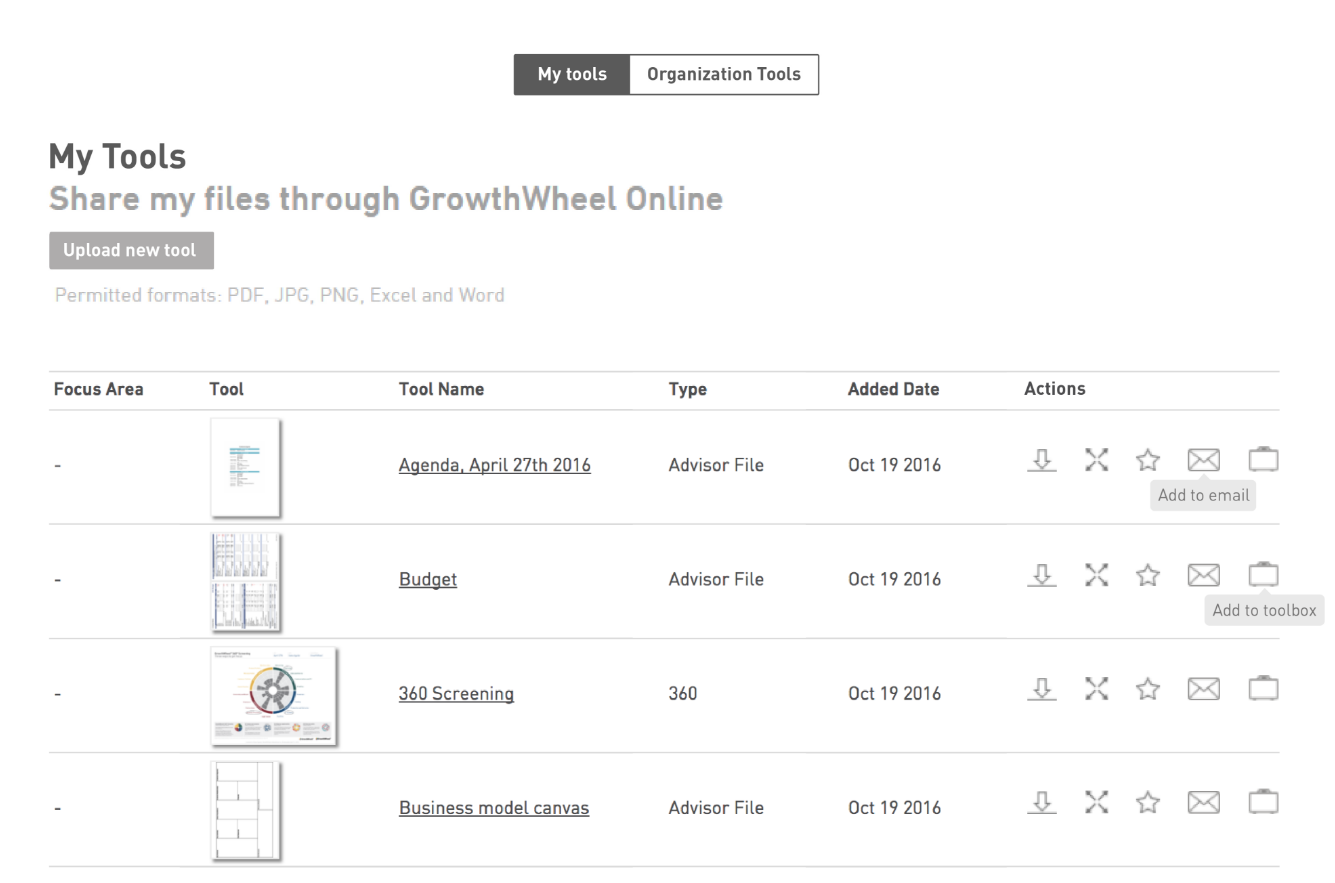
We have a new feature in the pipeline for managers. As a manager, you will soon be able to upload tools to the entire organization or some of your employees on GrowthWheel Online. The feature will help managers customize a program to the advisors they can use with clients and more.

  • Make it easier to manage the agenda for the entire organization, when you take the decisions they get more time to focus helping client companies.

  • Increase the productivity of the team by uploading the tools at once.

  • Provide your organization with homework, if you would encourage that your employees get greater insight into specific tools. You could e.g. send them an article to read every week.

Please share your comment below, and take part in the development of the upcoming page.

Screen Shot 2018-05-15 at 3.29.03 PM.png

We want to provide you with the best product possible, but it takes a good idea, so please send us your suggestions via the GrowthWheel Suggestion Form and become a GrowthWheel Co-creator.